COMPUTING > Cloud Servers > Public IP > Configuring Multiple IPs on an existing Linux Cloud Server

10.2.3 Configuring Multiple IPs on an existing Linux Cloud Server Cloud Server Pro service guide

Before you proceed you need to associate the Public IPs on an existing Cloud Server in the Control Panel.

You can then configure them in the network interface in your Linux Cloud Server:
 
  • Access your Linux Cloud Server using the Recovery Console
  • Launch from command line system-config-network.
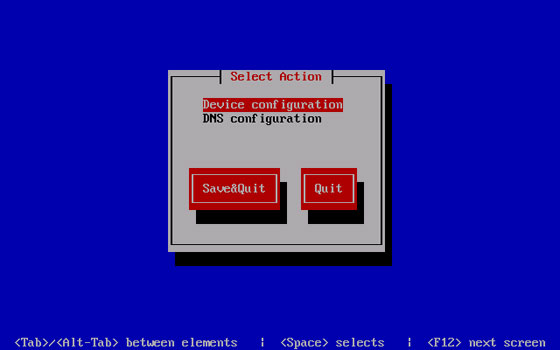
  • In the graphic interface, by moving with the arrows and the <Tab> navigate to Device Configuration and press "Enter".

  • This will bring up the list of network interfaces present: go to <New Device> and hit "Enter".

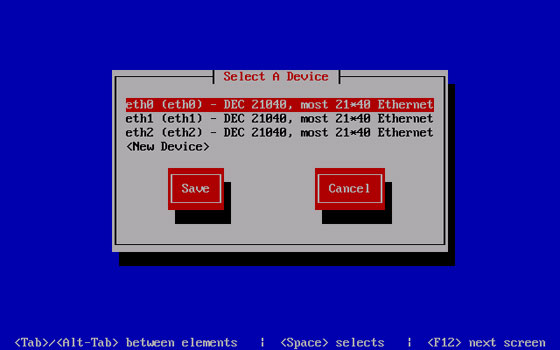
  • Choose "Ethernet" and confirm by selecting "Add".
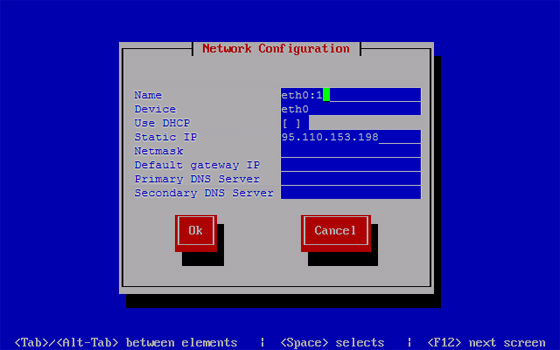
  • Choose the field Name for example eth0:1 indicating that it is the first alias on the network interface eth0, in Device enter the relevant network interface (in this example eth0), enter in Static IP the IP address you want to add, enter the subnet mask used in Netmask. Confirm with "OK", and Save (Save) in the subsequent screens and quit (Quit).

  • Run nano /etc/sysconfig/network-scripts/ifcfg-eth0:1 from the command line to create the configuration file for the alias of the eth0:2 network adapter simply replace eth0:1 with eth0:2 in the command line.
  • Edit the file by entering the details of the previously recorded Public IP, for the network adapter that you wish to configure. We remind you that to move within the text file you can use the arrows and to enter the new text you just need to add it after the existing lines (in the example we are configuring the first additional IP on the eth0 network adapter with the 95.110.162.52 IP network)

    DEVICE=eth0:1
    IPADDR=95.110.162.52
    NO_ALIASROUTING=yes
    ONPARENT=yes

  • Once you have entered all the details press "CTRL+O" to save the changes and then "CTRL+X" to exit the editor.
    For the IPADDR replace the example IP with the additional IP assigned in the Control Panel.
    The second additional IP must indicate in DEVICE eth0:2, the third eth0:3 and so on ...
  • To apply your changes simply run /etc/init.d/network restart.
  • Should you wish to use the system-config-network command line you need to connect in SSH and run yum -y install system-config-network-tui.

At this point, the Linux Cloud Server is correctly configured for the Multiple IPs service.
 
The configuration of IPs operation in the network interface of your own Cloud Server must be repeated every time you make a change in the technical panel relating to public IPs.