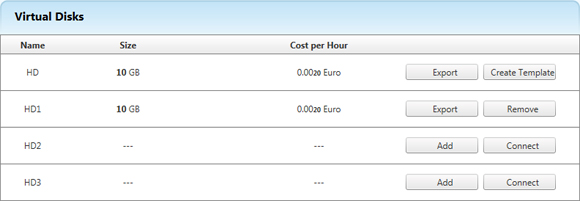
The deletion of a hard disk operation is reserved exclusively for additional disks (HD1, HD2, and HD3). In order to carry out this operation you need to turn off the Cloud Server from the control panel and then perform the removal by clicking on the button "
Remove" in the area marked "
Virtual Disks".
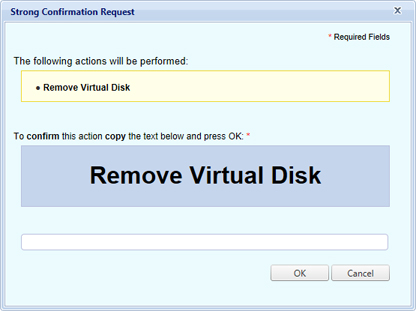
To make the changes effective confirm them by clicking on "
OK".
The operations described are examples: the improper use or use without due care and skill, can cause the partial and total loss of data, and in some cases may jeopardize the correct operation of the virtual server. Using this guide without the appropriate skills is not recommended. Aruba S.p.A. does not accept any responsibility for any problems or damage caused by using these guides