You can then configure them in the network interface in your Linux openSuse Cloud Server:
- Access your Linux openSuse Cloud Server using the Recovery Console.
- Run
yast2 from the command line.
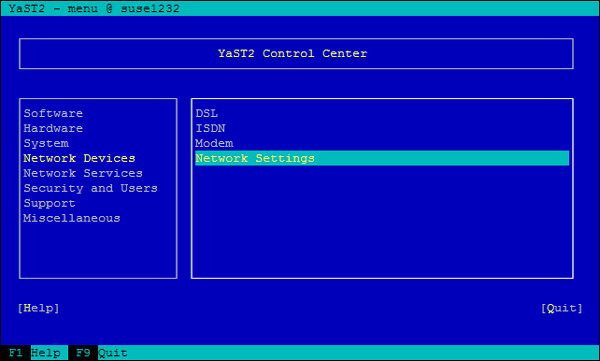
- In the graphical interface, move by using the arrow keys and the <Tab> on "Network Settings" in "Network Devices" and press "Enter".
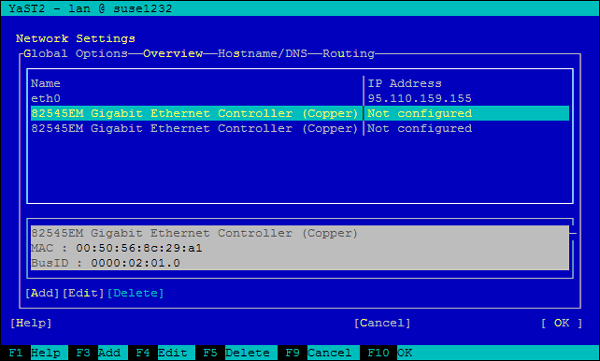
- A list of the existing network interfaces will appear: move by using the arrow keys and the <Tab> and select the network interface for which you are configuring the Multi-IP and after selecting [Edit] press "Enter".
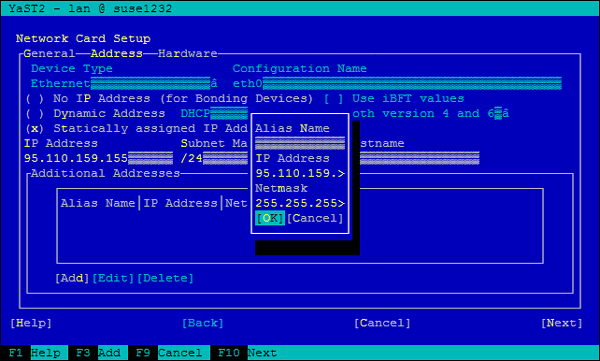
- In "Address" go to "[Add]" and then indicate the details of the IP and the subnet mask previously noted in the fields, leaving the "Alias Name" field empty. Confirm the changes by clicking on "OK".
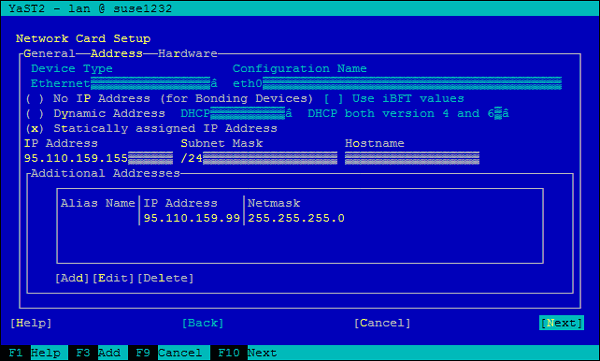
- Now in the "Address" tab in "Additional Addresses" the new IP will be displayed. Confirm the changes by clicking on "Next" and then on "OK", then exit by selecting "Quit".
At this point the Linux openSuse Cloud Server is correctly configured for the Multi-IP service.
The IPs in the network interface of your Cloud Server need to be configured each time you make changes to the public IPs in the control panel.