When you first login, or, in any case, before proceeding with the resale activity it is important customise your Technical Panel, because it will be visible and used by the Partner's customers.
To customise the Technical Panel proceed as follows:
- login to the "Partner Panel"
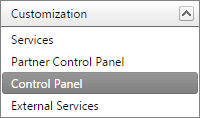
- go to the section "Customize"

- select the heading "Control Panel" from the menu on the left

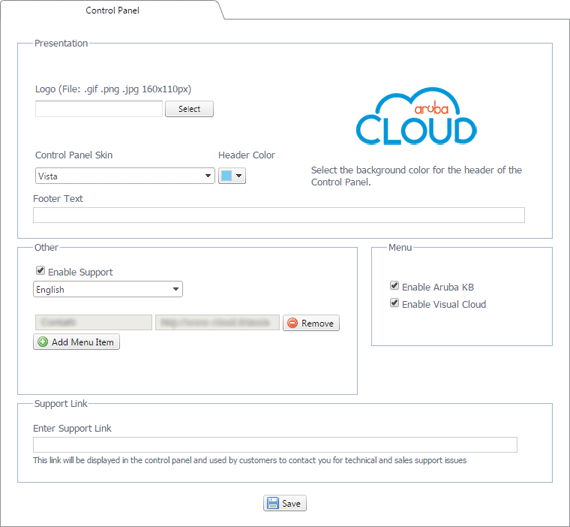
- a table will open like the one below

From this section you can perform the following operations:
- upload a logo
- choose a skin to apply to the Panel
- change the background colour of the header
- enter text in the footer
- enable Support and add other items
- enable the Aruba KB
Uploading a logo

To upload your logo you need to click on the "
Select" button and locate the image file for your logo on your computer. Once the procedure has been confirmed, the file will be uploaded to the Technical Panel and will be visible on the right. By saving the settings your company logo will be visible in the
header of the Technical Panel.
For better graphics we recommend that you upload a .png (PNG24) image with a transparent background of 320 x 80 pixels containing the logo. Please note that the size of the logo must be 320 px wide by 80 px high, the accepted format can be chosen from:
Choosing a skin

Another customisation feature is the choice of skins for graphic elements present in the Technical panel such as tables, buttons and headers. By selecting one of the skins offered, and saving the settings, the skin will be visible in, and applied to the Technical Panel.
Changing the background colour of the header

To choose the background colour of the
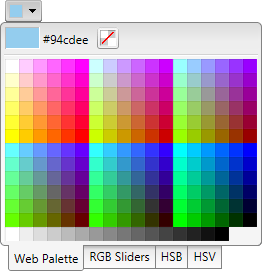
header of the Technical Panel just click on the button indicating the colour, a colour-picker will open via which you can select the desired colour. The colour-picker is provided with advanced options, such as RGB sliders, HSB and HSV with which you can identify with absolute precision the preferred colour. To confirm and apply the colour chosen click on the "
Save" button.
Entering text in the footer
You can enter text in the footer of the Technical Panel. The footer text cannot exceed 250 characters. It is advisable to use this field to show your information and contact information, so that they are always visible to your customers.
Enabling Support and adding other items
In the section "
Other", by enabling the option "
Enable Support" you can add or remove all of the menu items that you want to, which will be visible just below the menu Technical Panel management, in the "Support" group.
To Add a heading or remove it using the buttons present


This feature allows you to insert links to pages on your website relating to the support service, or to a contact page or request for intervention. If you do not activate this option, the link for support will not be seen.
Enabling the Aruba KB
In the "Menu" section you can enable the Aruba KB: by doing so, an entry will be added to the menu to the left of the Technical Panel which refers to Aruba Cloud Computing KB. This can be useful so that your customers that can use all of the guides for all the possible operations from the Technical Panel. The Aruba KB is enabled by default.
Once you have made all your changes you need to click on the "
Save" button

to make them active. At the end of the changes you will see a confirmation message like the following:
