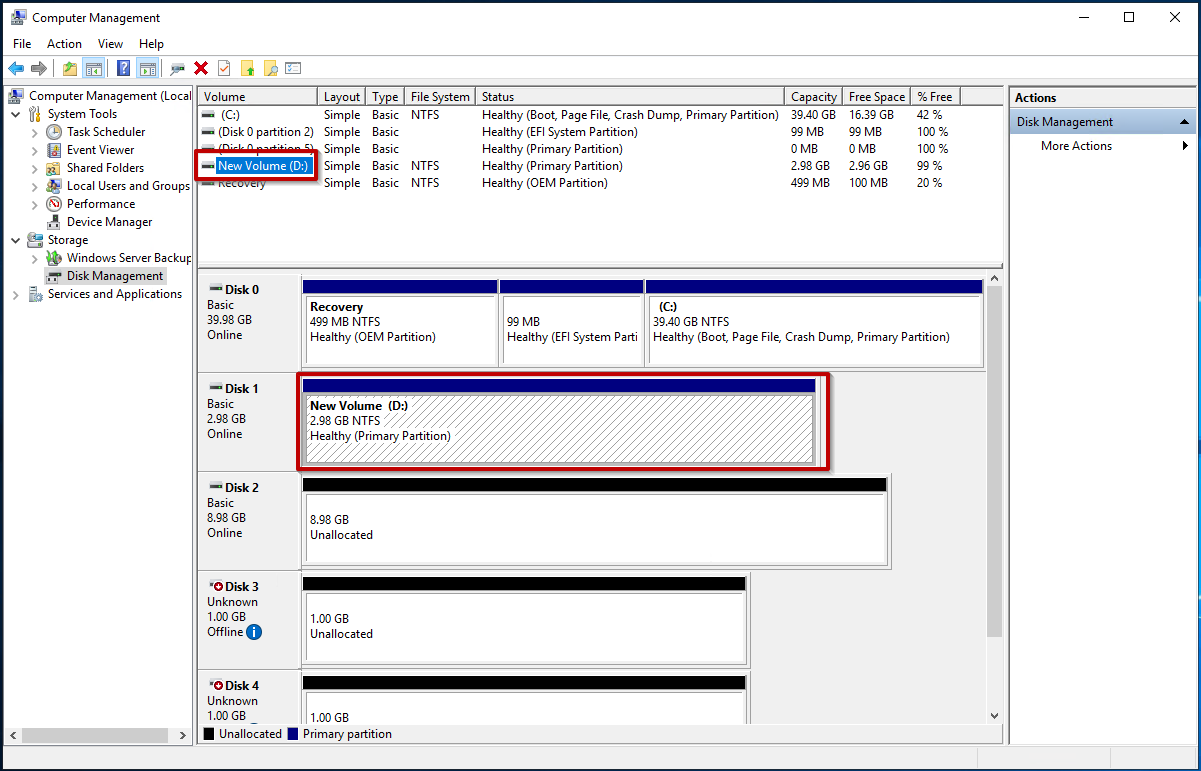
Installing the MPIO Service on Windows Server
The network names, mount points and corresponding IP addresses shown in the procedure are examples only.
- Access the Cloud Server (VMware Cloud Server or Cloud VPS Hyper-V) via RDP;
- go to Start and open Server Manager;
- start the process for adding roles and features by selecting Add roles and features;
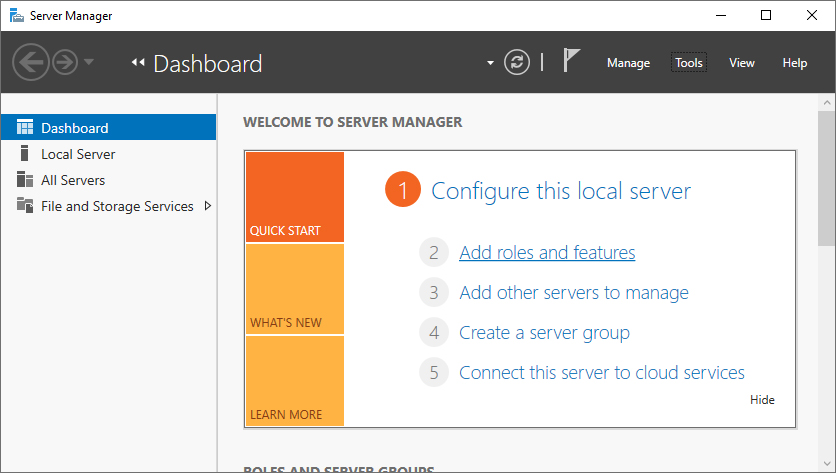
- confirm the steps by selecting Next;
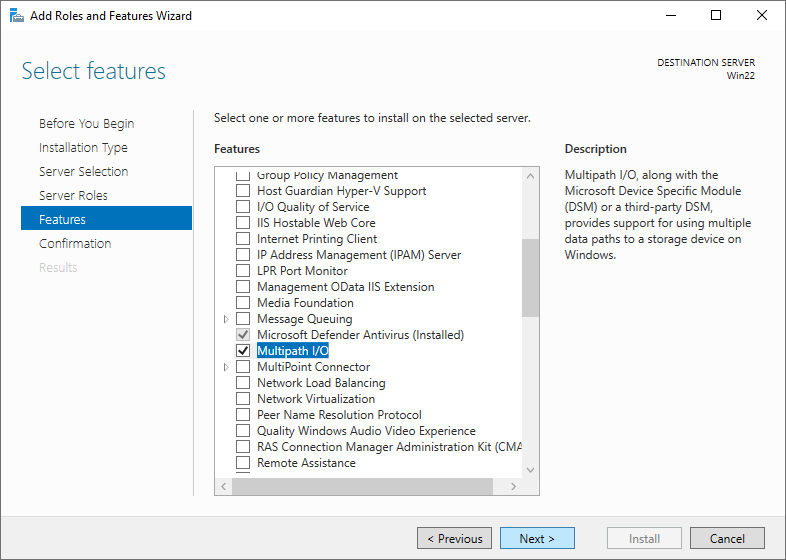
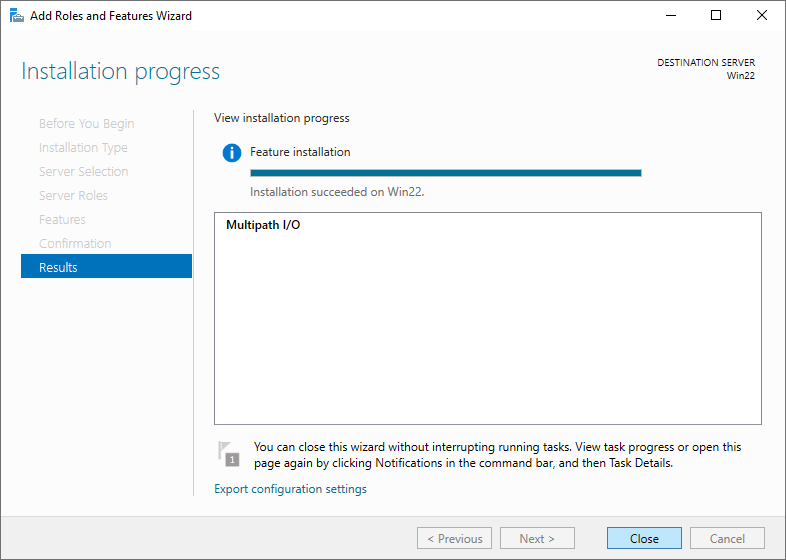
- in the Select features section, select Multipath I/O and then Next;
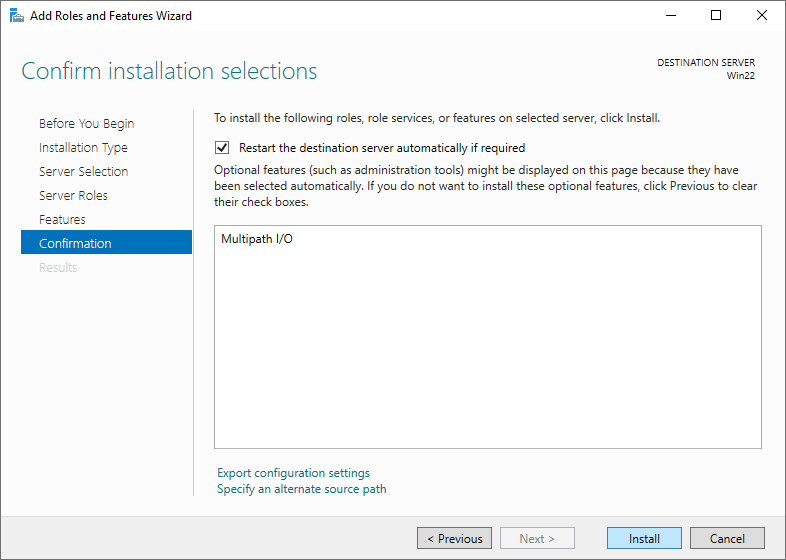
- in the Confirm installation selections section, select Restart the destination server automatically if required and then Install;
- in the Installation progress section, select Close.
Enabling MPIO for iSCSI
The network names, mount points and corresponding IP addresses shown in the procedure are examples only.
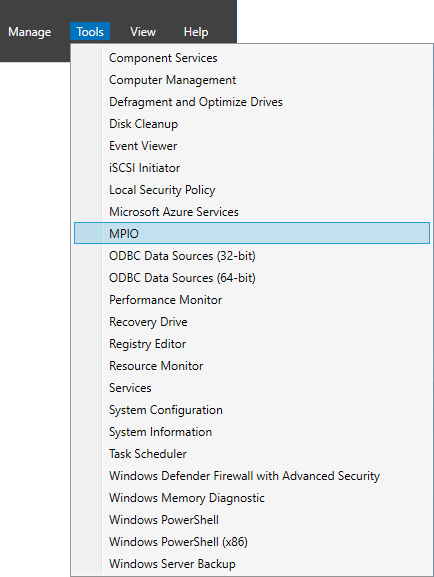
- From the Server Manager Dashboard, go to Tools and select MPIO;
- in the MPIO Properties window, select the Discover Multi-Paths tab;
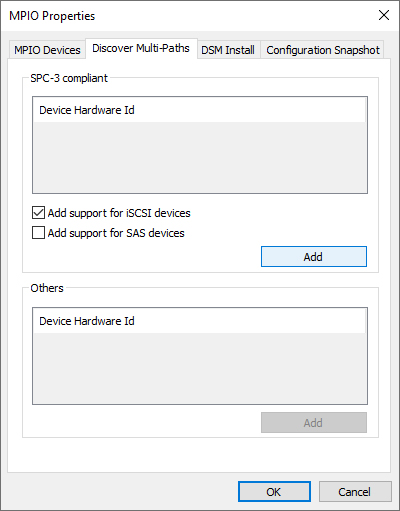
- select Add support for iSCSI devices;
- select Add;
- confirm with OK;
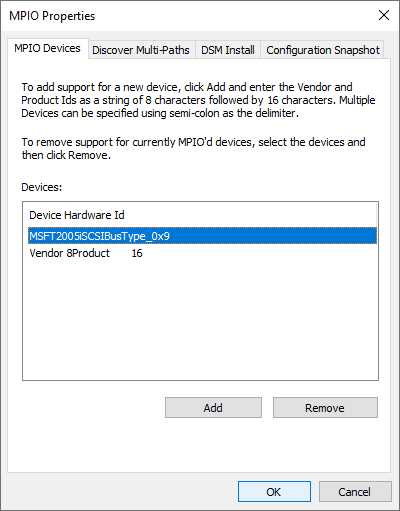
- select the MPIO Devices tab;
- make sure that a new device, generally named MSFT2005iSCSIBusType 0x9 or similar, is displayed in the Devices area.
Adding an iSCSI target to the server
The network names, mount points and corresponding IP addresses shown in the procedure are examples only.
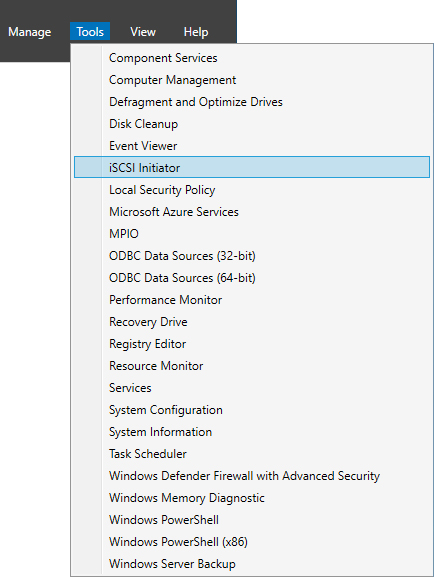
- From the Server Manager Dashboard, go to Tools and select iSCSI Initiator;
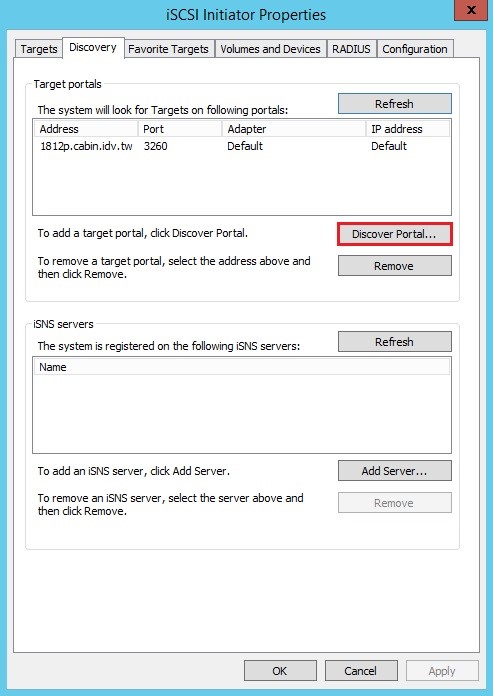
- in the iSCSI Initiator Properties window, select the Discovery tab and add all the storage IP addresses to Target portals using Discover Portal...;
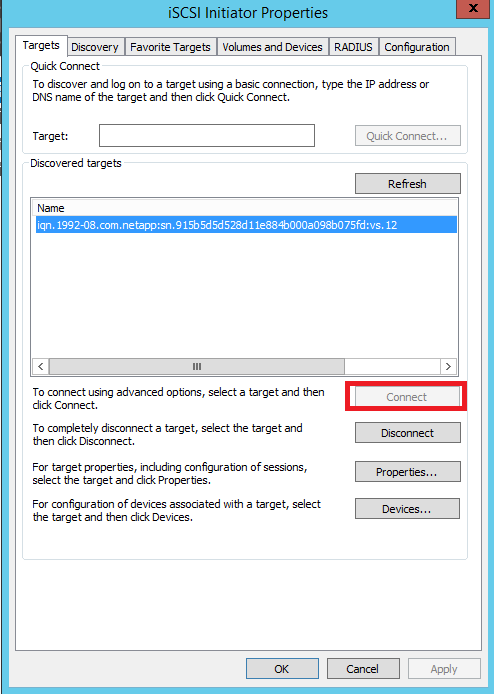
- select the Targets tab, select a mount point for which you want to enable MPIO and then select Connect;
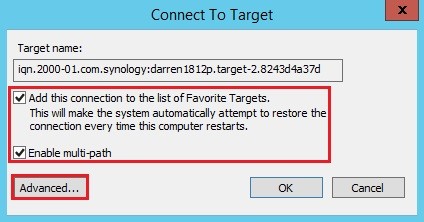
- select Add this connection to the list of Favorite Targets and Enable multi-path, then select Advanced...;
- in the Advanced Settings section:
- select Microsoft iSCSI Initiator from the Local adapter list;
- select an IP address from the Initiator IP list;
- select an IP address from the Target portal IP list, making sure that the two IP addresses belong to the same network.
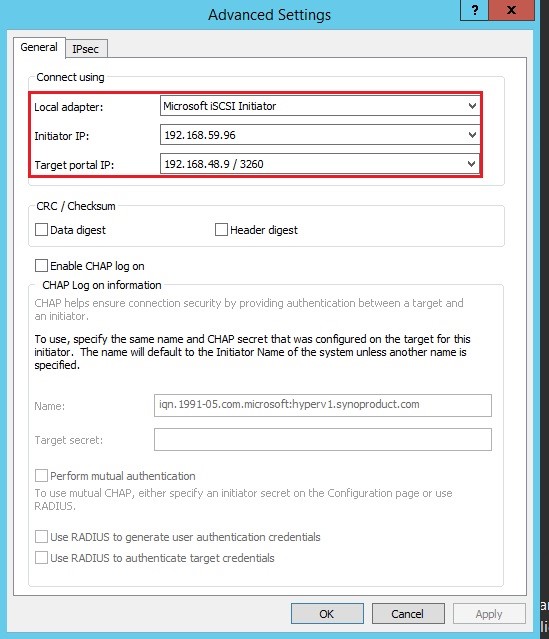
- confirm with OK.
Adding a secondary iSCSI Connection Path
The network names, mount points and corresponding IP addresses shown in the procedure are examples only.
- Add another iSCSI target by repeating the procedure described in Adding an iSCSI target to the server;
- select the Targets tab and then Devices;
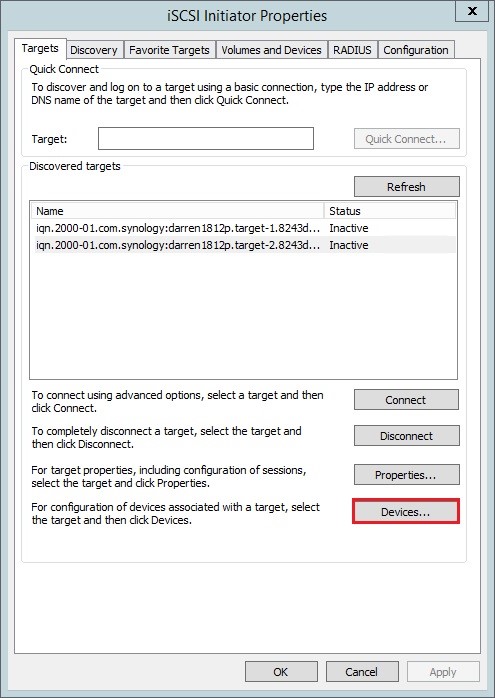
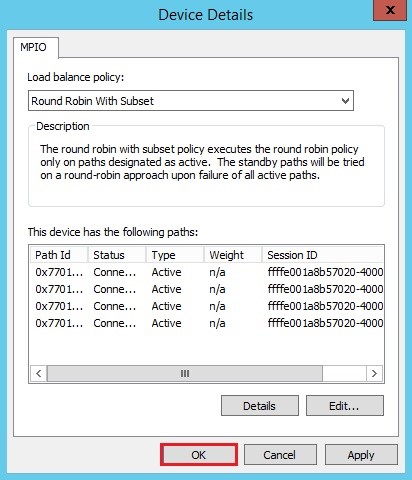
- in the window displayed, select MPIO;
- in the Load balance policy area, select a load balancing policy, such as Round Robin with Subset or Fail Over Only, then confirm with OK.
Configuring storage in Windows
The network names, mount points and corresponding IP addresses shown in the procedure are examples only.
- Open Computer Management from Control Panel > Administrative Tools;
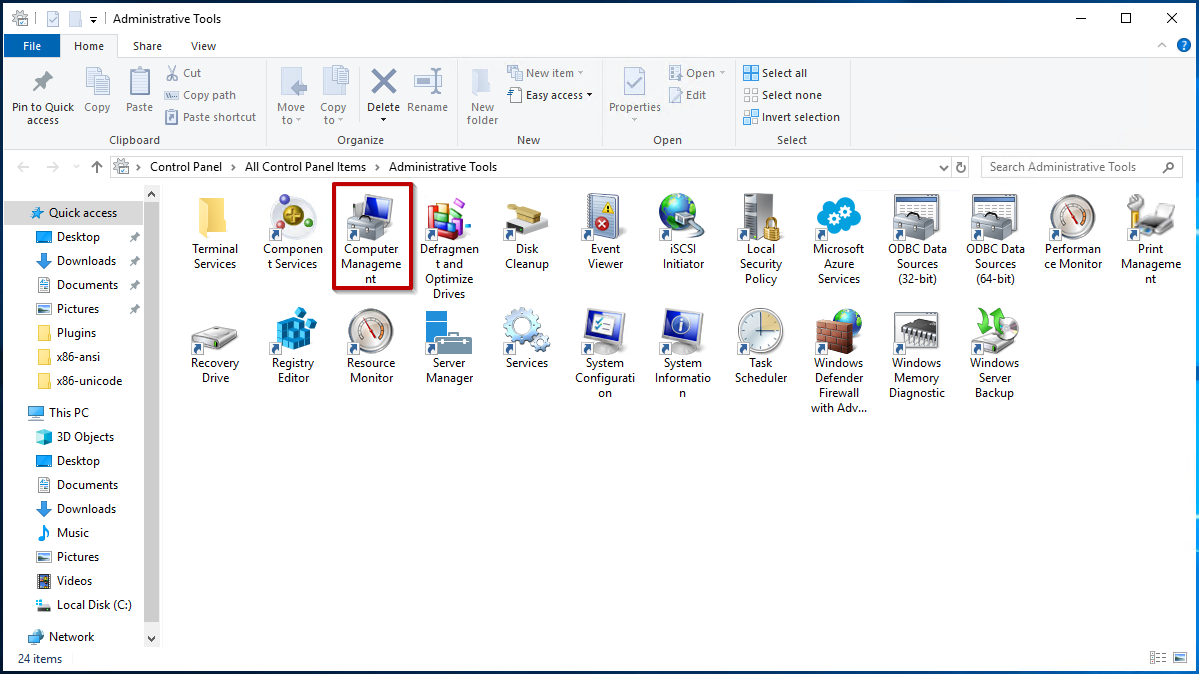
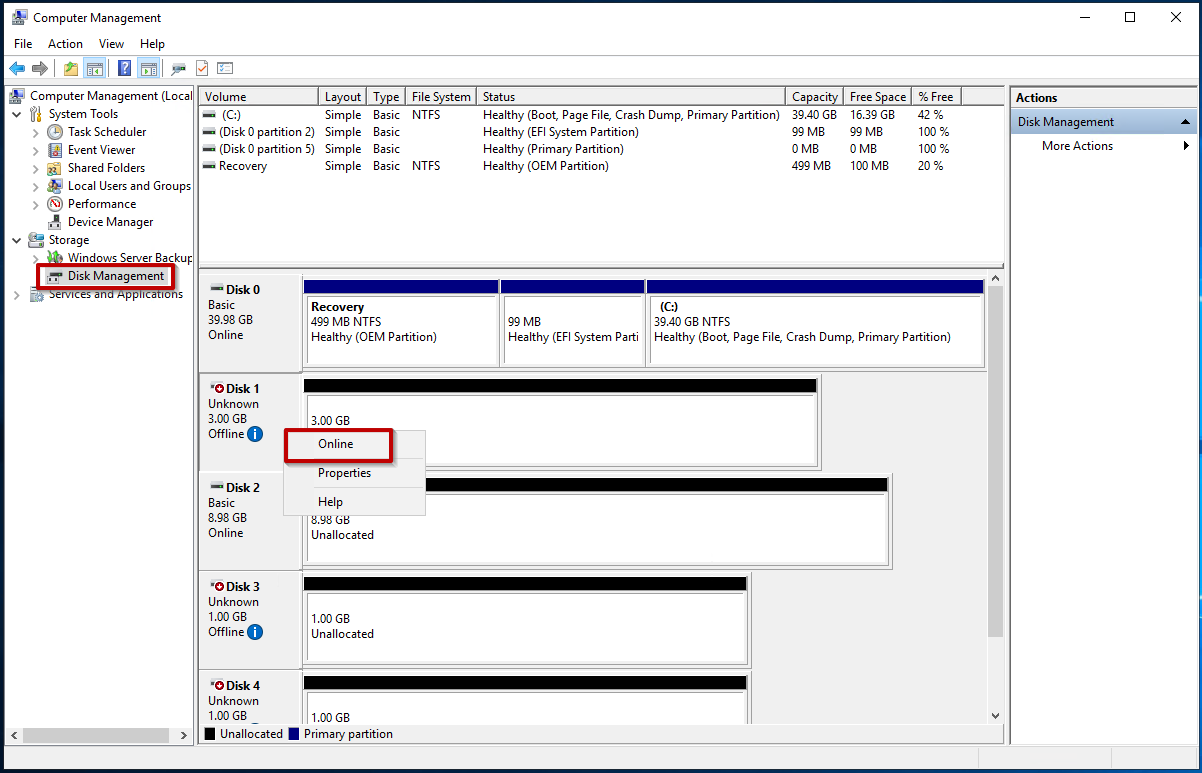
- select Disk Management from the menu on the left, locate the disk whose size matches the LUN, right-click it and select Online. The disk status changes to Not Initialized;
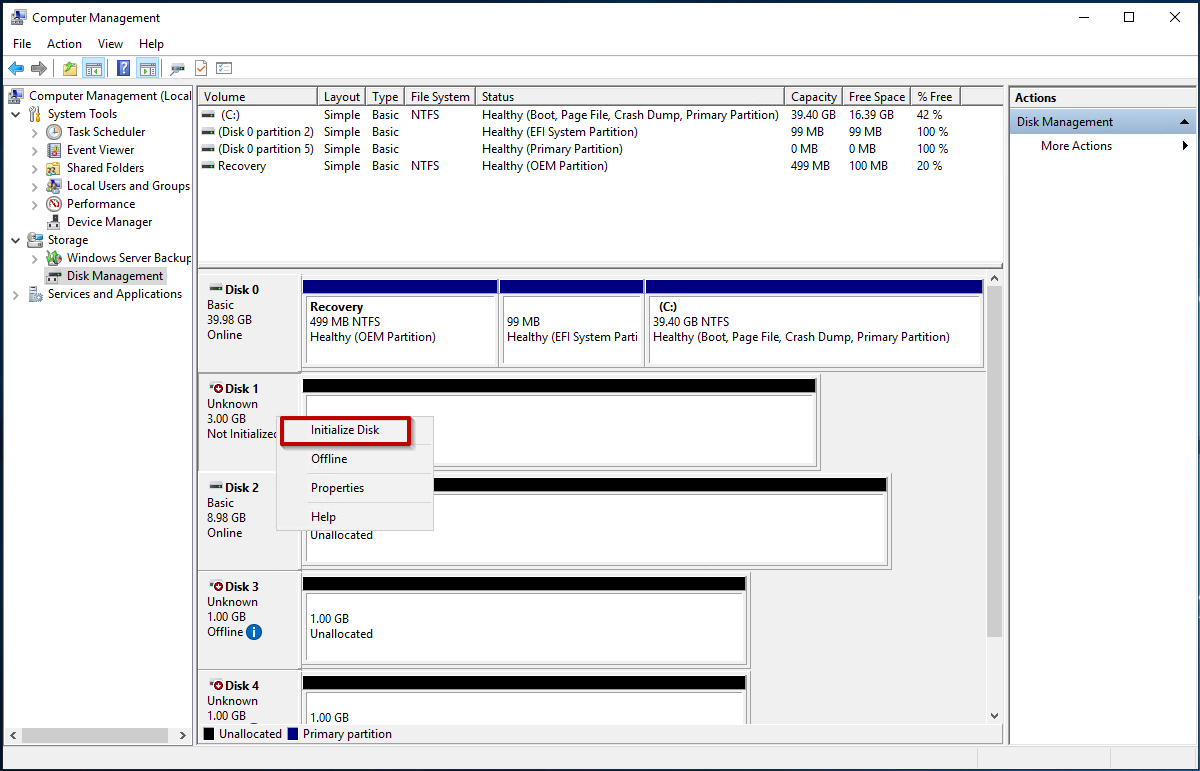
- right-click the disk again and select Initialize Disk;
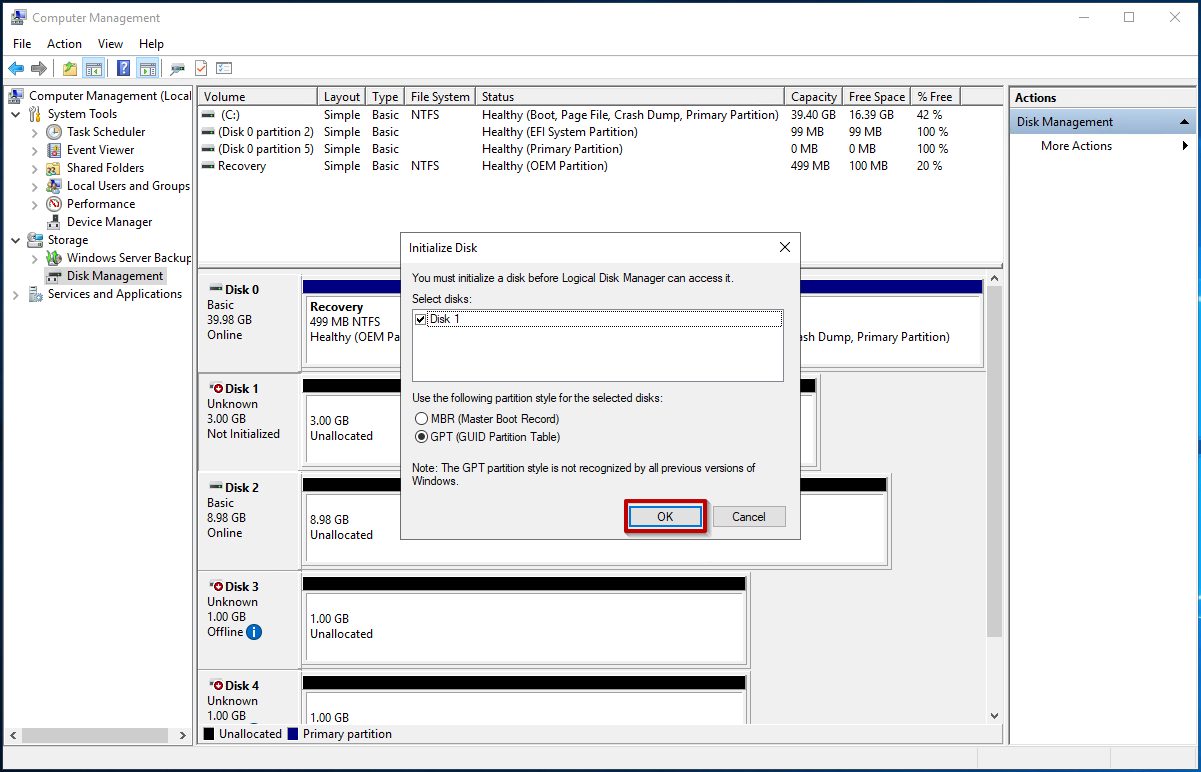
- select the partitioning method and confirm with OK. The disk status changes to Online;
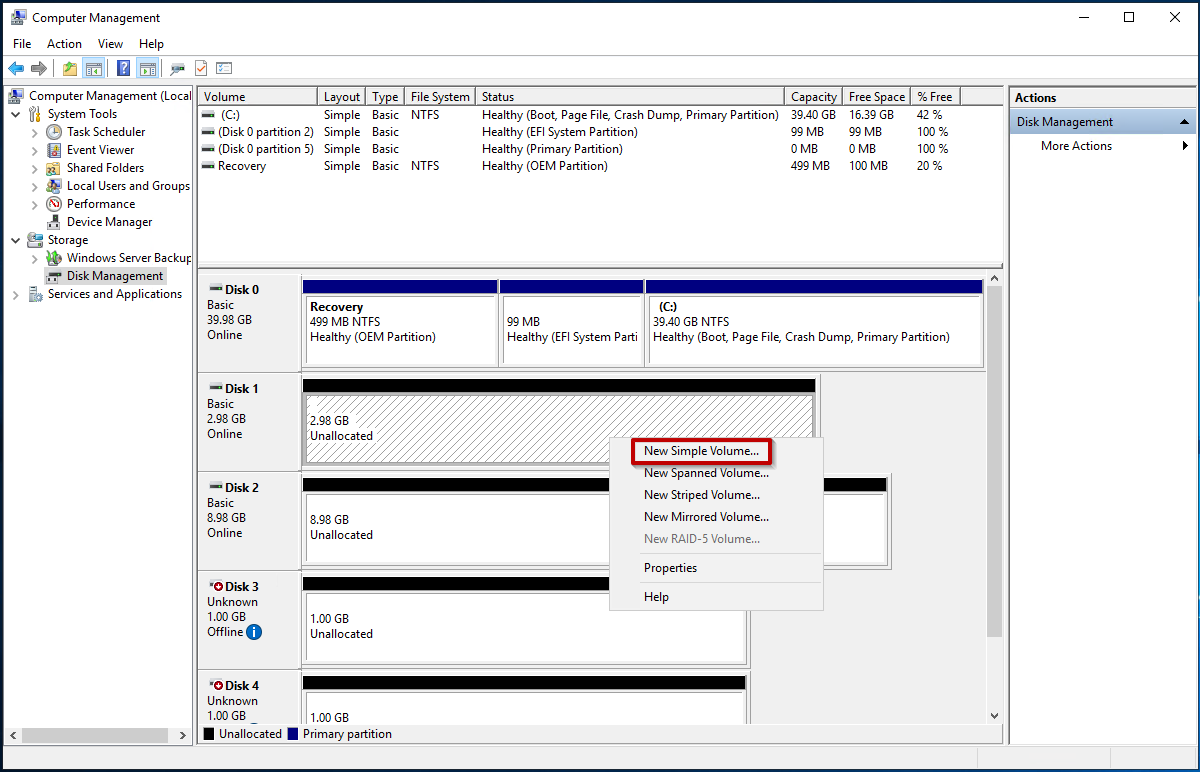
- right-click the disk and select New Simple Volume;
- follow the wizard to complete the creation of the new volume;
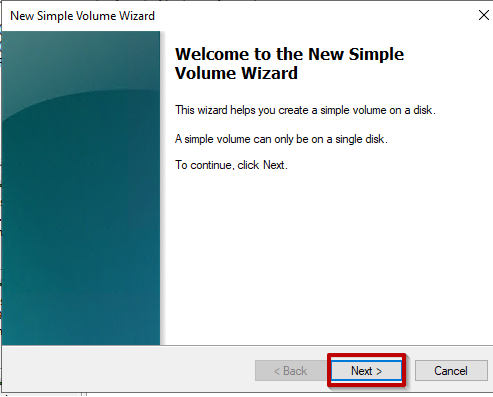
- once the process is complete, Windows displays a new drive with the assigned drive letter, which can be used as additional storage space.