To configure the network in your Linux Cloud Servers, the network card connected to the
Virtual Switch needs to have its own private IP address. To do this on Linux operating systems you need to
connect to the Cloud Server via SSH or
via the Recovery Console. You can also configure the network card in Linux either temporarily (until the next reboot), or permanently.
To configure the card temporarily, for diagnostic purposes or to check or test its functionality, proceed as follows:
- Run the
ifconfig command like so:
ifconfig <interface> <ip_address> netmask <netmask>
where in the order:
<interface> is the card that you want to configure (eth0 eth1 eth2);
<ip_address> is the private IP address of the private network that you wish to configure;
<netmask> is the sub netmask that you want to use;
E.g. launching ifconfig eth2 95.110.153.24 netmask 255.255.255.0 the card "eth2" will be configured with the IP "95.110.153.24" and the subnet mask "255.255.255.0"
- Run the "ifconfig" command:
ifconfig <interface>
to check that the card has been configured correctly (e.g. ifconfig eth2 to check the new setting on the card eth2).
To configure the network interface permanently, proceed as follows:
CentOS 5.x - CentOS 6.x
- Run the command:
system-config-network
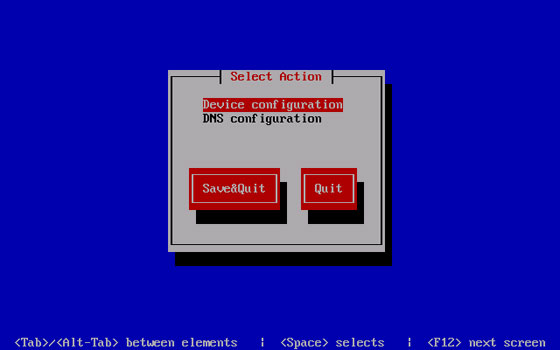
- In the graphical interface, by moving with the arrows, and the <Tab> navigate to
Device Configuration and press "Enter".
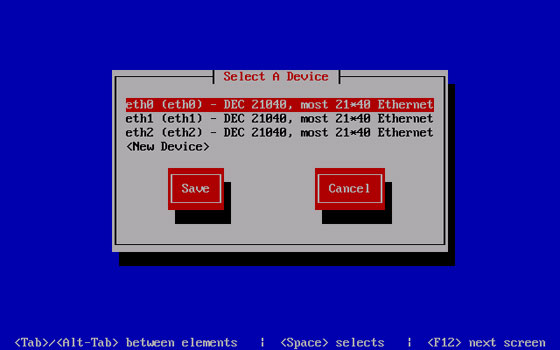
- This will open the list of network interfaces present: navigate to the tab that we previously associated and press "Enter".
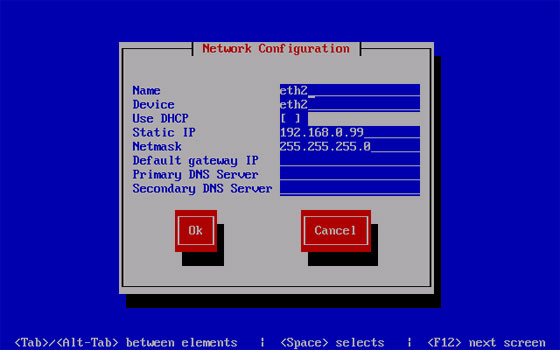
- Retrieve the values relating to the IP, previously recorded in their respective fields, and then confirm with "OK", Save (Save) in the subsequent screens and exit (Quit).
CentOS 6.x - Alternative method
- Run:
nano /etc/sysconfig/network-scripts/ifcfg-eth0
from the command line to edit the configuration file for the eth0 network interface (if you wish to edit the other interfaces simply replace eth0 with eth1 or eth2).
- Edit the file by entering the details of the IP for the network adapter that you wish to configure. We remind you that to move within the text file you can use the arrows and to enter the new text you just need to add it after the existing lines (in the example we are configuring the eth0 network adapter with the 192.168.0.99 private IP with 255.255.255.0 netmask).
DEVICE=eth0
NM_CONTROLLED=no
ONBOOT=yes
TYPE=Ethernet
DEFROUTE=yes
IPV4_FAILURE_FATAL=yes
IPV6INIT=no
NAME="System eth0"
BOOTPROTO=none
IPADDR=192.168.0.99
NETMASK=255.255.255.0
- Once you have entered all the details press "CTRL+O" to save the changes and then "CTRL+X" to exit the editor.
- We remind you that when setting up a private network you should also check and if needed set the gateway IP by running:
nano /etc/sysconfig/network
from the command line.
- To apply your changes simply run:
/etc/init.d/network restart
To assign IP addresses we recommend that you follow some basic rules to avoid any problems. For more details see the private IP address.
Repeat the operation described above for all the Cloud Servers that are part of the network you are configuring. We remind you that the IP selected for each Cloud Server of your network must be unique, otherwise a clash of IP's could be generated which prevents the communication between the Cloud Servers via the private network.