To be able to associate public IPs to their Cloud Servers via the control panel:
- Click on the tab "CLOUD Computing" (Fig.1) to display the list of Cloud Servers created and click on "Manage" (Fig.2) in the line that corresponds to the server to which you wish to assign a public IP
- Scroll down the management page for the Cloud Server until the section "Network Cards" where the network cards installed are listed (Fig.3 ).
- Click on the button "Assign Public IP" for the network card that you want to use.
- When prompted, select from the list the Public IPs to which you intend to associate the Cloud Server and confirm.
 [fig.1]
 [fig.2]
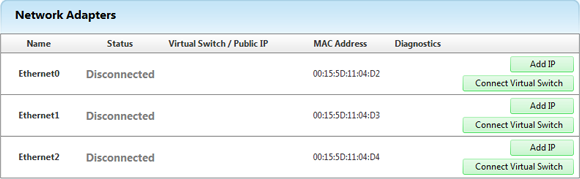 [fig.3]
After a few moments the Public IP will be associated to that Cloud Server. At the end of the assignment operation, to complete the operation of association with the Public IP, you will have to configure your network card on each and every Cloud Server (
Windows,
Linux).